Digital Tutors

  • Subscribe to our RSS feed.
  • Twitter
  • StumbleUpon
  • Reddit
  • Facebook
  • Digg

Tuesday, 6 May 2008

I get this question a lot

Posted on 19:03 by Unknown

I get this question a lot - I love hearing from people about their projects and renderings - so I thought I'd post this one

To: craig irevit.com
Subject: Rendering Settings

Dear Craig,

What settings do you typically use for interior and exterior renderings to get the best rendering?  In switching over to Revit 2009, I am having a hard time getting the same, if better, quality of renderings. 

Also, are there no clouds anymore in 2009?  When we adjust the setting for sky, we never get clouds, no matter the setting chosen.  Also, what settings have you found to typically work for quality?  Such as general options, image precision, ext. 

Thanks,

Sara

______________________________________________

Hi Sara,

In the Render Dialog, there is a setting for the “Scheme” in the lighting area. You want to choose the most appropriate/applicable setting for the type of rendering you have. If you are using it for interior rendering, and have lights inside the space, and windows, you will want “Interior:Sun and Artificial”. This choice makes a huge difference in the way and locations the mental-ray rendering engine bounces light.

 Render  exposure

When you render with “draft” or “low” quality settings you will get a good enough image to judge whether the settings are providing what you are looking for. If it looks good, then you can render with “Best”. Once you get the lighting right, and render with the “best” setting, then you can use the “Adjust Exposure” button and adjust the various values for more contrast and etc.  Below are two examples of the differences achieved with the settings.

3D View 1

Image with Lighting Scheme: Exterior Sun only, and no exposure adjustment, Quality-Low

 3D View 2

Image with Lighting Scheme: Interior Sun and Artificial and exposure value at 8.2, Quality-Medium

 3D-View-2b

Image with Lighting Scheme: Interior Sun and Artificial and exposure value at 8.2, Quality-Medium and hidden line overlay

Clouds, and more

In terms of clouds, yes there are still clouds available. The setting is located below the lighting in the background settings. You have the option of 5 degrees of cloudiness or a color, as well as a slider for haziness. Below you see three different cloudiness settings rendered with medium quality. I you don't get clouds no matter what settings you set, than I would have to believe that your installation was not complete and you did not get the Render package.

Other important considerations are choosing good materials, setting the best light direction and render quality. Revit 2009 has a much better library of materials than previous versions. You can also take the stock materials and vary the bump mapping depth and glossiness and etc. Remember to make a duplicate of the material before you change any of the settings. Once you have rendered your test in Draft setting, adjust the exposure with the "Adjust Exposure" button dialog. The exposure value will bring your rendering from the depths of pitch black to daylight exposure and beyond to over-bright white. Then you can play with the highlights and mid tones and other settings to get the perfect image.

3D View Render noclouds  Render-noclouds

Image with Lighting Scheme: Exterior Sun only,
Quality:Medium,
Background Style: No Clouds, and low haze

3D View Render clouds

Image with Lighting Scheme: Exterior Sun only,
Quality:Medium,
Background Style: Cloudy, and low haze

3D View Render verycloudy-nohaze

Image with Lighting Scheme: Exterior Sun only,
Quality:Medium,
Background Style: Very Cloudy, and no haze

3D View Render color

Image with Lighting Scheme: Exterior Sun only,
Quality:Medium,
Background Style: Color-Black (note: no haze and no gradient available)

The output settings for your final image can be approximated by the end use of the image. For example if you plan on showing the image in a Powerpoint slide show, then the "Resolution" setting can be set to "Screen" and you can zoom in the view until the width and height is about 1024 pixels by 768 pixels. This would be fine for the typical Powerpoint.

If you intend on printing the image, a good resolution to use for typical prints is 150 DPI. By default the field of view is 6" by 4 1/4" but you can change the size by selecting the crop region of the Perspective 3D view and clicking the size button in the options bar shoeing the dimentions. In the "Crop Region Size" dialog that pops up, select "Scale(locked proportions" and change the width to the size of the space you need to fill. The height will adjust proportionately. Click OK and you will see that the view adjusts scale but doesn't change the extents.

CropSize

If you are still having trouble email the picture and/or file and I’ll check it out.

I’d love to see it when you’ve got it looking good.

Cheers,

Craig

Read More
Posted in | No comments

Tuesday, 29 April 2008

Ballroom Re-hash

Posted on 04:34 by Unknown

This is a re-post from my original blog that was hacked a while back:

August 10, 2007, 10:22 pm

Enjoy the links on the Right and email me if you've got a good one to add.

BallroomCap

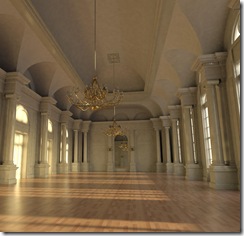
One of the latest Revit models I've finished was this ballroom. The dentals(hard to see) were created using a line-based family which is hosted to the moulding and made a quick job of it. There are some elements here using model lines to create/represent the form, including the secondary chandeliers, and column capitals. This model made for an enjoyable 2 weeks. The rendering is using Revit 2008's built in accurenderer which was satisfactory, but 3D max would have provided a much better result.

Academy Ballroom 2

Building complex calculation into families, far beyond those in the line-based family referred to above, are fascinating. Tutorials will be posted in the Revitology section and will cater to fun how-to's and Revit modelling methods and tricks.

Keep Watching.

Read More
Posted in | No comments

Wednesday, 23 April 2008

Bench (and Windows Live Writer Test)

Posted on 04:31 by Unknown

I'm entering a competition that a furniture company has put on. They specialize in plywood furniture so I have taken a sheet of plywood and bent it into itself, then locked into place with a little Japanese style joinery. It's a Japanese company. I'm using  Revit 2009


Bench

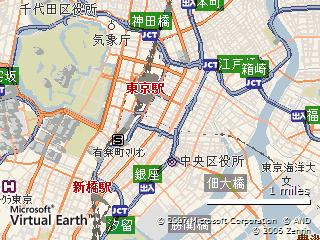
The competition is located here:

Map image

Done with Windows Live Writer which I like a lot.


... I have continued to work on this bench over the weekend and made some minor changes.  Being parametric and adjustable to any size made for some complications which I haven't worked out. The overall width of the bench is not difficult to make parametric. The only tricky part is repeating the pin-joints along the back as the width varies. This can be done using an array, but it's worth noting that with parametric arrays, come added computation which in turn leads to a heavy component. 

The trickiest part of this component & design is varying the angle of the front and back. I need the reference lines that determine the angles to pivot around the center of the corner radii, so the nicely curved corners don't deform when the angle is adjusted. It sounds easy but I haven't gotten it to lock down.

Here is the latest image and video:

SustainaBench


I think I have solved my little rounded corner problem with some math, two reference planes creating an origin for a reference line, and some angle parameters. This should allow my corners to flex without deforming or breaking constraints. We will see if it works in the field. stay tuned


 Capture test corner(ya wouldn't think it was so difficult)

Read More
Posted in | No comments

Wednesday, 16 April 2008

Philly Revit User Group - Next meeting about Revit 2009

Posted on 13:54 by Unknown

If you are in the Philadelphia or surrounding areas, please join us at the Philadelphia Revit User Group.
Check out the boards here and attend the next meeting!
http://groups.google.com/group/phillyrevit
 
Read More
Posted in | No comments

Friday, 14 March 2008

Rendering tool in Revit 2009

Posted on 06:08 by Unknown

Being one who has always preferred showing renderings over floor plans and spent a fair amount of time generating Accurender renderings in previous versions of Revit, I am thrilled with the transition to Mental Ray in RAC 2009. The whole rendering process has been simplified, for the better in my opinion, as you can see by the sparse designbar options for the "Rendering" tab!  The factory could have just put the lone button under the "View" tab and gotten rid of the tab entirely! Don't be discouraged by it's limited appearance. Enhancements to the Rendering engine, Materials and Exposure adjustments should keep you content.

r1

The first Dialog you see when you click the lone "Render View..." button is this, giving you options for rendering the view or Region of the view, the resolution by screen or print size, lighting options, background options and the "Adjust Exposure" tool which is worth it's weight in gold(can I say that about a dialog?)
The lighting drop-down gives you six options, 3 for exterior and 3 for interior renderings, and each of those consist of Sun only, Sun + Artificial light, and Artificial light only.

r2

The Exposure adjustment tool is a powerful tool and very welcomed tool, giving the ability to make high quality adjustments to 5 different exposure settings. This feature saves a bundle of time usually spent on post-production in Photoshop.

r3

Materials have also had an overhaul. The patterning appears to be exactly the same, but you will note the cleaned-up interface. Gone are the smoothness and glow settings, leaving only transparency in the shading box.

r4

The Render appearance tab is where things are turned up a notch with a respectable library of materials, and material settings, including one I've been wanting for years now, yes, Bump Maps! 
There are also better preview options and more which I will get into later, but I've got to get to the mines! I'll post the rest later.

r5

Read More
Posted in | No comments

Monday, 25 February 2008

Loft Blendiness

Posted on 04:57 by Unknown

Playing around today with the massing tools in Revit2009 I had 2 hours to burn and I whipped up a fun little building.  This is a combination of a blend loft and various voids. Which then I skinned with wall types and made floors and etc. It's highly suspect whether this is structurally sound but it was more of an exploration of the new loft blend tool.

bendiness1

A view from the front. The plans that this study model generated were very good and brought to mind the complicated task of documenting a building with such an organic form, and the necessity to establish simple math foundation to the form.

bendiness2

Once I arrived at the general form I was shooting for, I stopped and threw on some materials for a few quick renders to see the results. 
Revit is an amazing tool for doing quick studies such as this. What I'm not showing is the additional data that this model provides such as square feet, volume, quantity take-offs and etc.

bendiness3

Read More
Posted in Revit | No comments

Monday, 11 February 2008

iRevit remake and Revit 2009

Posted on 05:17 by Unknown

Welcome to iRevit – We're putting up a whole new site to make it easier to post.
I took the old Revit model I did last year and re-rendered it in Revit 2009 last week with a noticeable difference in speed and quality. The gray image is the Revit 2008 and the Color image is from Revit 2009. Check them out:

Ballroom-e

Revit 2008 Rendering using radiosity, overlayed hidden line and few materials. (this took 12hours +/-)

3D ViewHistoric Photo Match-best with Revit exposure adjusted

The same model rendered quickly in Revit 2009 with the same material and view settings except for the floor. (this took 2 hours)

That's not all you will see from Revit 2009. 
New navigation tools
New massing and form tools
better performance and 
more control over project documentation

We'll be fully back up soon.
Cheers

Read More
Posted in | No comments
Newer Posts Older Posts Home
Subscribe to: Posts (Atom)

Popular Posts

  • Exciting news!
      I don’t usually discuss things like this on this blog but in this case I will make an exception. My company, KlingStubbins , is merging wi...
  • You, an iRevit contributor
    Clearly, being an international Revit-man of mystery doesn't leave much time for providing you with Revit recipes for greatness or other...
  • Hauer explorations continued
    Although the tools available in Revit make it very difficult to get even remotely close to the prototypical Hauer panel like in the photo be...
  • Increase efficiency and accuracy of surveys
    Earlier this month Tobias Ebbinge from Picard Innovations reached out to me to introduce his company and software called Yuzu . You may hav...
  • Handy tool to identify good keyboard shortcuts 4u
    I just came across this little tool on Rod Howarth's blog and if you work in Revit day-to-day then you'll find this useful. It anal...
  • What Revit Wants: Repurposing the Autodesk USB Media
      What Revit Wants: Repurposing the Autodesk USB Media   If you happen to have a 16Gb or 32Gb 2012 Autodesk Design Suite USB thumb dri...
  • Revit 2010 Ribbon development
      There has been much discussion and blogging about the new ribbon interface in the latest edition of Autodesk’s Revit platform . To ge...
  • Revit Hatch patterns revisited
    A long time ago I talked about the in's and out's of hatch patterns in Revit and how they are made from scratch. I'm not sure w...
  • Revit Hardware?
    Over the years I have seen this question pop up pretty consistently, and that is the "Hardware" question. "What's the bes...
  • ACADIA '08 - Expanding the boundaries of Computer Aided Architectural Design
    Minneapolis, MN - This year's ACADIA conference [Association for Computer Aided Design in Architecture]  was titled "Silicon &...

Categories

  • 3d Printing
  • Add-in
  • Add-ons
  • beta
  • BIM
  • BIMapps
  • clothing
  • Cloud
  • Components
  • Craig Barbieri
  • dependant files
  • efficiency
  • etransmit
  • families
  • feedback
  • funny
  • halflife2
  • hardware
  • Hatch
  • hively
  • humor
  • Infographic
  • joke
  • Labs
  • metrics
  • Neon
  • performance
  • Plug-in
  • Plugins
  • Rendering
  • Revit
  • Revit 2012
  • Revit STL
  • Revit Technologies
  • RFI's
  • Scheduling
  • Standards
  • support
  • sympathy
  • Tips
  • Transmittals
  • Tricks
  • Vasari
  • workstation

Blog Archive

  • ▼  2013 (13)
    • ▼  November (3)
      • Revit rendering vs. Autodesk cloud rendering - Fight!
      • Classical Architecture with Revit
      • What to Expect When Your Client Is Expecting BIM -...
    • ►  September (1)
    • ►  August (2)
    • ►  July (1)
    • ►  June (3)
    • ►  May (1)
    • ►  February (1)
    • ►  January (1)
  • ►  2012 (10)
    • ►  November (1)
    • ►  September (1)
    • ►  August (1)
    • ►  July (3)
    • ►  June (1)
    • ►  May (1)
    • ►  March (1)
    • ►  January (1)
  • ►  2011 (28)
    • ►  November (5)
    • ►  August (2)
    • ►  July (2)
    • ►  June (12)
    • ►  May (2)
    • ►  February (3)
    • ►  January (2)
  • ►  2010 (3)
    • ►  August (1)
    • ►  July (1)
    • ►  January (1)
  • ►  2009 (8)
    • ►  December (1)
    • ►  October (1)
    • ►  August (1)
    • ►  July (1)
    • ►  April (2)
    • ►  February (1)
    • ►  January (1)
  • ►  2008 (18)
    • ►  December (2)
    • ►  November (1)
    • ►  October (2)
    • ►  August (3)
    • ►  July (1)
    • ►  May (3)
    • ►  April (3)
    • ►  March (1)
    • ►  February (2)
  • ►  2007 (3)
    • ►  December (1)
    • ►  October (1)
    • ►  August (1)
Powered by Blogger.

About Me

Unknown
View my complete profile