Digital Tutors

  • Subscribe to our RSS feed.
  • Twitter
  • StumbleUpon
  • Reddit
  • Facebook
  • Digg

Thursday, 31 July 2008

Large Project's & Lighting

Posted on 05:10 by Unknown

Recently one of the discussion's we have been having in the office is about lighting in large projects where there is an Architecture model and a separate MEP model.

 bulb

As an Architect, I want to place and move lighting as I work and so do our Interiors folks. The electrical Engineer needs the lighting in his MEP model to make the electrical connections and get his loads totaled and etc.. When there are two separate models, there arises a question of how to handle this in the most practical and efficient manner and there are two obvious solutions, each with there own merits.

The First solution is to maintain the lighting in the Architecture model. This means that in order for Electrical to make the necessary connections, they need to place a face-hosted "Connector Family" onto a face of the light fixture and maintain the correct information that relates to the luminaries, in the connector family. This is by far the easiest up-front solution, but...

The Second solution is to have the Architect place lighting in the MEP model, providing MEP with the most practical coordination option. The caveats with this method are firstly that ceiling hosted lighting will need to be changed to face hosted or workplane hosted as there are typically no ceilings in an MEP model; And secondly, that the ceiling in the architectural model will have to be manually coordinated (holes cut) for recessed lighting and etc.. This method provides the least risk for coordination errors, as a lighting fixture change can be transparent for example switching two-lamp to four-lamp luminaries. The change in fixture size will be noticeable in a coordination view in the Architecture model, and the ceiling can be adjusted.

The second option is what we are using and so far it's working out well. Perhaps after a couple releases of Revit, this issue will be solved. A related focus of attention is how to handle lighting analysis and we have been using 3DMax's new lighting analysis assistant with good result, but perhaps that's another post.

Read More
Posted in | No comments

Wednesday, 28 May 2008

Immersive Building Information Model viewing

Posted on 19:46 by Unknown


My friend over at BIMx posted HKS Gaming Engine for BIM which discusses using Environment engines or "gaming" engines with BIM and which is long overdue for Architecture and design. Essentially this is not static image rendering but real-time immersive environments. I have seen attempts at this before but never to the extent or ease that I expect. Design firms spend thousands of dollars to produce a single static image of a 3 dimensional architectural model having materials and lighting and textures and entourage.  When all of this information is used to create a static rendering or at best an animation or walk-through, there is a grand loss of effort and energy and information. In my opinion it is an almost wasted effort and definitely and archaic method of architectural representation. Granted, the static rendering serves its purpose but it is essentially a huge waste of energy and information assets.

The imagery generated from Revit 2009's Mental Ray engine, isn't much better than the realtime rendering achieved by DirectX10 shown in these images, and note that the complexity here is the same or more when you take into consideration the geometries necessary for the secondary elements and entourage such as vegetation, video, volumetric lighting, and etc:

354 

HalfLife2_City17_TrainStationSquare 

77 

metastasis-3

But that's not all these pretty immersive experiences provide through environment engines such as "Unreal Engine3" and Valve's "Source" engine. You get realistic physics, surround sound, particle effects, multi-layered textures, complex lighting and reflections. All provided and generated in real-time as you walk through the environment with your keyboard and mouse much like so many people do in games and the ever popular MMORPG's.

I see this Archengine from HKS a step closer to what we can currently experience in existing "gaming" engines but it has a way to go. check out the video here and click on Portfolio. Another company providing a somewhat similar system idea is Applied IDEAS. Ken and Pia Maffei presented their 3DMax-based method at AU2007.

The typical example of the current engine's physics and other capabilities is nothing but underused if you look at this example (wow) [you should press mute before you click here]

2127303245_53cdabf897_o

The main problem that no one has really solved yet (or maybe Archengine has?) is the automated translation/filtering of the BIM to the surface model and environment data necessary for use in this manner. Solve this and tie it to one of these virtual environment engines("gaming engines") enabling Architects and design firms to export and package up their clients' projects on a disc to be installed on their kids' computers. Don't forget to include the standard footstep audio and etc. Easily a multi-million dollar opportunity still untapped. 

Read More
Posted in | No comments

Saturday, 24 May 2008

TIP: The Open/Close or Welcome Page

Posted on 05:55 by Unknown

One of the most useful tools we use at KlingStubbins is what we call the the Open/Close or Welcome Page. It has several uses especially for larger Work-sharing projects and teams, and is also useful for smaller projects.

Welcome Page

  1. Welcome page as file/team information page - Being able to have a quick summary of file, project and team information when the file is opened is invaluable.
    1. Company name(self promotion) and Client logo and/or project name - self explanatory, but worth noting. The project is instantly recognized an it is clear which file has been opened.
    2. File updates - Here the Revit team Leader notes dates and times of file compressing, archiving, purging unused, transferring project standards, Reviewing Warnings, Major version upgrades, and so forth. It serves as a reminder to do these things as much as it is a notice that they were done.
    3. File Management Post - Here we explain the importance of always Saving to Central on this page, as well as listing the team members and their roles such as Revit Leader, Project Architect, Project Manager, Structural and MEP team members and contact information.
    4. Team Post - This is useful for team members to post other information, not always project related. Some examples are Reminders of team meetings and happy-hours, Birthdays, and random stuff. 
  2. Welcome Page as time saver - By saving to central with this view maximized, there are other benefits.
    1. The team sees this page and it's update info every time they save to central
    2. The processing requirements of this page are minimal compared to a plan or 3D view. This means that loading the file will be quicker and has a noticeable impact on large projects.
    3. This is a Neutral view. This is a common view. Many team members find it annoying when they open the file to another team members working view, which they have to close and open up their own working view[we use the method of having working views for each team member which they tack their names on at the end and work in, and then have separate sheet views which always maintain their Visibility/Graphics settings].
    4. By keeping this view open but minimized, Saving to central is as easy as maximizing the view and selecting Save to Central from the file menu.
  3. Part of the office templates - This page is also part of the office template and continues to grow in it's usefulness and creative team members continue to add to it.
  4. A simple Legend view - We use a Legend view to host this tool. You could also use a drafting view or a sheet view, though the Legend is most convenient as we generally do not have very many, compare to the number of sheets and drafting views the project finishes with, making it easier to find if it is closed.

Lots of information can be added to this view including some typical how-to's and etc. but be careful not to overload it or you'll be negating the second point of having it. And that's it.

Read More
Posted in | No comments

Tuesday, 6 May 2008

I get this question a lot

Posted on 19:03 by Unknown

I get this question a lot - I love hearing from people about their projects and renderings - so I thought I'd post this one

To: craig irevit.com
Subject: Rendering Settings

Dear Craig,

What settings do you typically use for interior and exterior renderings to get the best rendering?  In switching over to Revit 2009, I am having a hard time getting the same, if better, quality of renderings. 

Also, are there no clouds anymore in 2009?  When we adjust the setting for sky, we never get clouds, no matter the setting chosen.  Also, what settings have you found to typically work for quality?  Such as general options, image precision, ext. 

Thanks,

Sara

______________________________________________

Hi Sara,

In the Render Dialog, there is a setting for the “Scheme” in the lighting area. You want to choose the most appropriate/applicable setting for the type of rendering you have. If you are using it for interior rendering, and have lights inside the space, and windows, you will want “Interior:Sun and Artificial”. This choice makes a huge difference in the way and locations the mental-ray rendering engine bounces light.

 Render  exposure

When you render with “draft” or “low” quality settings you will get a good enough image to judge whether the settings are providing what you are looking for. If it looks good, then you can render with “Best”. Once you get the lighting right, and render with the “best” setting, then you can use the “Adjust Exposure” button and adjust the various values for more contrast and etc.  Below are two examples of the differences achieved with the settings.

3D View 1

Image with Lighting Scheme: Exterior Sun only, and no exposure adjustment, Quality-Low

 3D View 2

Image with Lighting Scheme: Interior Sun and Artificial and exposure value at 8.2, Quality-Medium

 3D-View-2b

Image with Lighting Scheme: Interior Sun and Artificial and exposure value at 8.2, Quality-Medium and hidden line overlay

Clouds, and more

In terms of clouds, yes there are still clouds available. The setting is located below the lighting in the background settings. You have the option of 5 degrees of cloudiness or a color, as well as a slider for haziness. Below you see three different cloudiness settings rendered with medium quality. I you don't get clouds no matter what settings you set, than I would have to believe that your installation was not complete and you did not get the Render package.

Other important considerations are choosing good materials, setting the best light direction and render quality. Revit 2009 has a much better library of materials than previous versions. You can also take the stock materials and vary the bump mapping depth and glossiness and etc. Remember to make a duplicate of the material before you change any of the settings. Once you have rendered your test in Draft setting, adjust the exposure with the "Adjust Exposure" button dialog. The exposure value will bring your rendering from the depths of pitch black to daylight exposure and beyond to over-bright white. Then you can play with the highlights and mid tones and other settings to get the perfect image.

3D View Render noclouds  Render-noclouds

Image with Lighting Scheme: Exterior Sun only,
Quality:Medium,
Background Style: No Clouds, and low haze

3D View Render clouds

Image with Lighting Scheme: Exterior Sun only,
Quality:Medium,
Background Style: Cloudy, and low haze

3D View Render verycloudy-nohaze

Image with Lighting Scheme: Exterior Sun only,
Quality:Medium,
Background Style: Very Cloudy, and no haze

3D View Render color

Image with Lighting Scheme: Exterior Sun only,
Quality:Medium,
Background Style: Color-Black (note: no haze and no gradient available)

The output settings for your final image can be approximated by the end use of the image. For example if you plan on showing the image in a Powerpoint slide show, then the "Resolution" setting can be set to "Screen" and you can zoom in the view until the width and height is about 1024 pixels by 768 pixels. This would be fine for the typical Powerpoint.

If you intend on printing the image, a good resolution to use for typical prints is 150 DPI. By default the field of view is 6" by 4 1/4" but you can change the size by selecting the crop region of the Perspective 3D view and clicking the size button in the options bar shoeing the dimentions. In the "Crop Region Size" dialog that pops up, select "Scale(locked proportions" and change the width to the size of the space you need to fill. The height will adjust proportionately. Click OK and you will see that the view adjusts scale but doesn't change the extents.

CropSize

If you are still having trouble email the picture and/or file and I’ll check it out.

I’d love to see it when you’ve got it looking good.

Cheers,

Craig

Read More
Posted in | No comments

Tuesday, 29 April 2008

Ballroom Re-hash

Posted on 04:34 by Unknown

This is a re-post from my original blog that was hacked a while back:

August 10, 2007, 10:22 pm

Enjoy the links on the Right and email me if you've got a good one to add.

BallroomCap

One of the latest Revit models I've finished was this ballroom. The dentals(hard to see) were created using a line-based family which is hosted to the moulding and made a quick job of it. There are some elements here using model lines to create/represent the form, including the secondary chandeliers, and column capitals. This model made for an enjoyable 2 weeks. The rendering is using Revit 2008's built in accurenderer which was satisfactory, but 3D max would have provided a much better result.

Academy Ballroom 2

Building complex calculation into families, far beyond those in the line-based family referred to above, are fascinating. Tutorials will be posted in the Revitology section and will cater to fun how-to's and Revit modelling methods and tricks.

Keep Watching.

Read More
Posted in | No comments

Wednesday, 23 April 2008

Bench (and Windows Live Writer Test)

Posted on 04:31 by Unknown

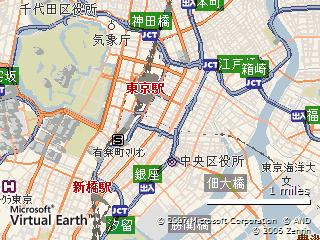
I'm entering a competition that a furniture company has put on. They specialize in plywood furniture so I have taken a sheet of plywood and bent it into itself, then locked into place with a little Japanese style joinery. It's a Japanese company. I'm using  Revit 2009


Bench

The competition is located here:

Map image

Done with Windows Live Writer which I like a lot.


... I have continued to work on this bench over the weekend and made some minor changes.  Being parametric and adjustable to any size made for some complications which I haven't worked out. The overall width of the bench is not difficult to make parametric. The only tricky part is repeating the pin-joints along the back as the width varies. This can be done using an array, but it's worth noting that with parametric arrays, come added computation which in turn leads to a heavy component. 

The trickiest part of this component & design is varying the angle of the front and back. I need the reference lines that determine the angles to pivot around the center of the corner radii, so the nicely curved corners don't deform when the angle is adjusted. It sounds easy but I haven't gotten it to lock down.

Here is the latest image and video:

SustainaBench


I think I have solved my little rounded corner problem with some math, two reference planes creating an origin for a reference line, and some angle parameters. This should allow my corners to flex without deforming or breaking constraints. We will see if it works in the field. stay tuned


 Capture test corner(ya wouldn't think it was so difficult)

Read More
Posted in | No comments

Wednesday, 16 April 2008

Philly Revit User Group - Next meeting about Revit 2009

Posted on 13:54 by Unknown

If you are in the Philadelphia or surrounding areas, please join us at the Philadelphia Revit User Group.
Check out the boards here and attend the next meeting!
http://groups.google.com/group/phillyrevit
 
Read More
Posted in | No comments
Newer Posts Older Posts Home
Subscribe to: Posts (Atom)

Popular Posts

  • Exciting news!
      I don’t usually discuss things like this on this blog but in this case I will make an exception. My company, KlingStubbins , is merging wi...
  • You, an iRevit contributor
    Clearly, being an international Revit-man of mystery doesn't leave much time for providing you with Revit recipes for greatness or other...
  • Hauer explorations continued
    Although the tools available in Revit make it very difficult to get even remotely close to the prototypical Hauer panel like in the photo be...
  • Increase efficiency and accuracy of surveys
    Earlier this month Tobias Ebbinge from Picard Innovations reached out to me to introduce his company and software called Yuzu . You may hav...
  • Handy tool to identify good keyboard shortcuts 4u
    I just came across this little tool on Rod Howarth's blog and if you work in Revit day-to-day then you'll find this useful. It anal...
  • What Revit Wants: Repurposing the Autodesk USB Media
      What Revit Wants: Repurposing the Autodesk USB Media   If you happen to have a 16Gb or 32Gb 2012 Autodesk Design Suite USB thumb dri...
  • Revit 2010 Ribbon development
      There has been much discussion and blogging about the new ribbon interface in the latest edition of Autodesk’s Revit platform . To ge...
  • Revit Hatch patterns revisited
    A long time ago I talked about the in's and out's of hatch patterns in Revit and how they are made from scratch. I'm not sure w...
  • Revit Hardware?
    Over the years I have seen this question pop up pretty consistently, and that is the "Hardware" question. "What's the bes...
  • ACADIA '08 - Expanding the boundaries of Computer Aided Architectural Design
    Minneapolis, MN - This year's ACADIA conference [Association for Computer Aided Design in Architecture]  was titled "Silicon &...

Categories

  • 3d Printing
  • Add-in
  • Add-ons
  • beta
  • BIM
  • BIMapps
  • clothing
  • Cloud
  • Components
  • Craig Barbieri
  • dependant files
  • efficiency
  • etransmit
  • families
  • feedback
  • funny
  • halflife2
  • hardware
  • Hatch
  • hively
  • humor
  • Infographic
  • joke
  • Labs
  • metrics
  • Neon
  • performance
  • Plug-in
  • Plugins
  • Rendering
  • Revit
  • Revit 2012
  • Revit STL
  • Revit Technologies
  • RFI's
  • Scheduling
  • Standards
  • support
  • sympathy
  • Tips
  • Transmittals
  • Tricks
  • Vasari
  • workstation

Blog Archive

  • ▼  2013 (13)
    • ▼  November (3)
      • Revit rendering vs. Autodesk cloud rendering - Fight!
      • Classical Architecture with Revit
      • What to Expect When Your Client Is Expecting BIM -...
    • ►  September (1)
    • ►  August (2)
    • ►  July (1)
    • ►  June (3)
    • ►  May (1)
    • ►  February (1)
    • ►  January (1)
  • ►  2012 (10)
    • ►  November (1)
    • ►  September (1)
    • ►  August (1)
    • ►  July (3)
    • ►  June (1)
    • ►  May (1)
    • ►  March (1)
    • ►  January (1)
  • ►  2011 (28)
    • ►  November (5)
    • ►  August (2)
    • ►  July (2)
    • ►  June (12)
    • ►  May (2)
    • ►  February (3)
    • ►  January (2)
  • ►  2010 (3)
    • ►  August (1)
    • ►  July (1)
    • ►  January (1)
  • ►  2009 (8)
    • ►  December (1)
    • ►  October (1)
    • ►  August (1)
    • ►  July (1)
    • ►  April (2)
    • ►  February (1)
    • ►  January (1)
  • ►  2008 (18)
    • ►  December (2)
    • ►  November (1)
    • ►  October (2)
    • ►  August (3)
    • ►  July (1)
    • ►  May (3)
    • ►  April (3)
    • ►  March (1)
    • ►  February (2)
  • ►  2007 (3)
    • ►  December (1)
    • ►  October (1)
    • ►  August (1)
Powered by Blogger.

About Me

Unknown
View my complete profile